TRANSFER DYE
|
STEP 1 Paint onto paper (teacher can prepare) |

|
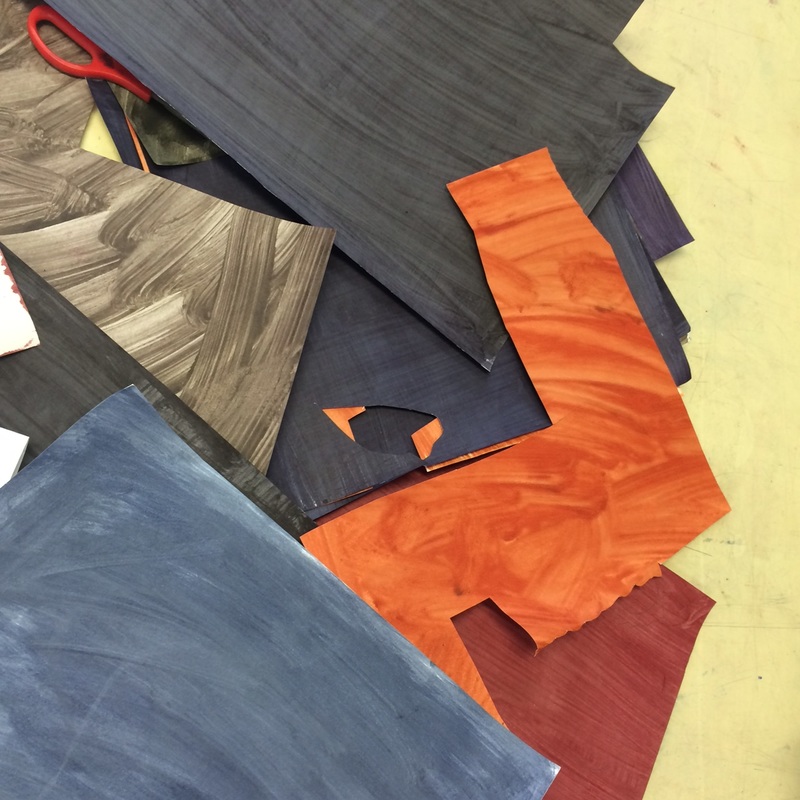
STEP 2 plan design and cut out painted paper to create your design.. |
|

SAFETY!! - get iron ready
Always check if the iron is hot before you use it .....
Do this by rubbing the iron on the ironing board and then checking the heat on that cloth.
NEVER touch the iron with your fingers.
Always check if the iron is hot before you use it .....
Do this by rubbing the iron on the ironing board and then checking the heat on that cloth.
NEVER touch the iron with your fingers.


|
STEP 3
Pin the calico onto your design, placing pins in the four corners and two in the center on the sides of the fabric |


|
STEP 4
Iron onto the paper side (so fabric should be at the bottom - see image) REMEMBER not to iron over pins... RATHER... iron one side removing SOME pins as you go.... keep some pins in tact so your design stays in the same place... check your design by slightly lifting the paper off (but keep pins in areas so you can maintain the same spot) |

STEP 5
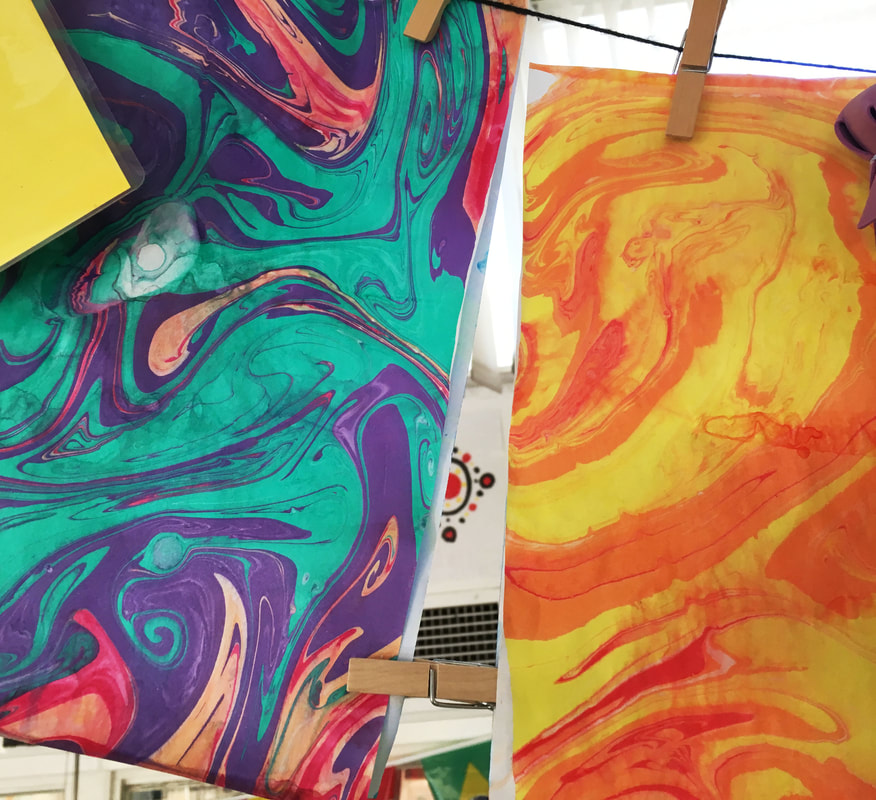
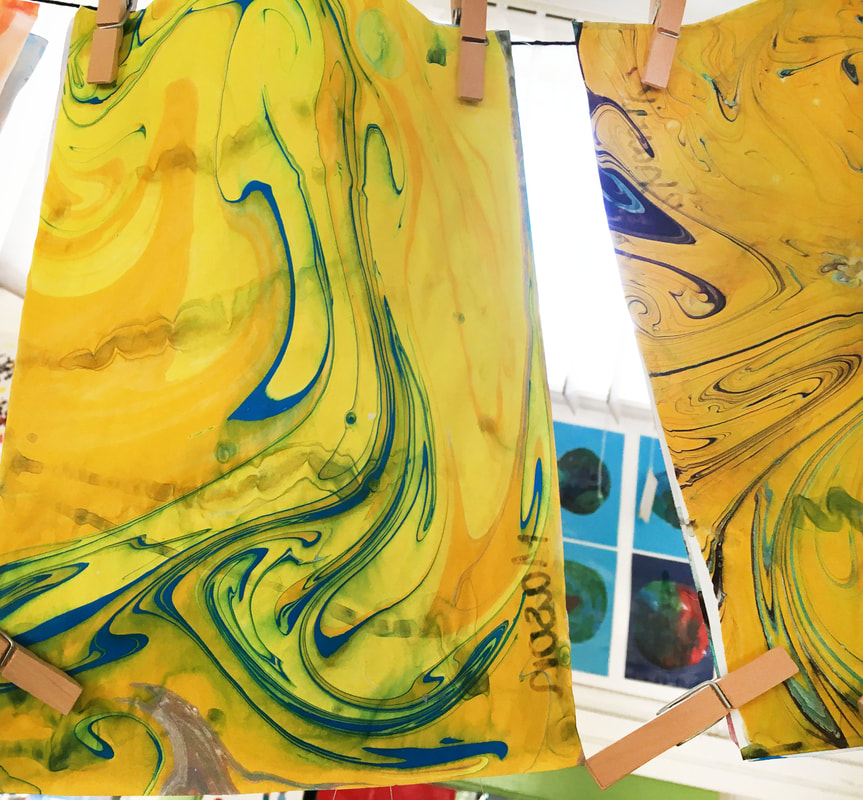
Reveal the final result!
Notice there are white spots in corners.... this means ironing has happened when the pins are still in the fabric... try to avoid this.
See more examples lower down
Reveal the final result!
Notice there are white spots in corners.... this means ironing has happened when the pins are still in the fabric... try to avoid this.
See more examples lower down

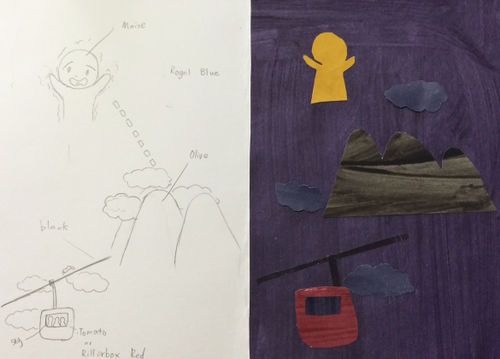
Student work
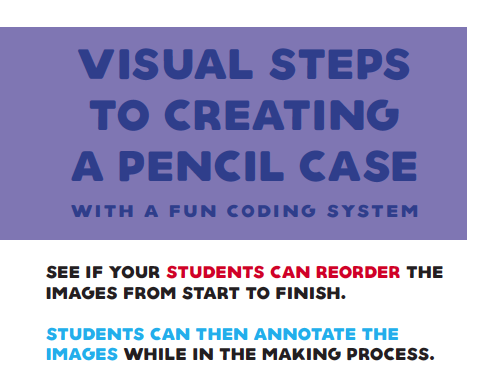
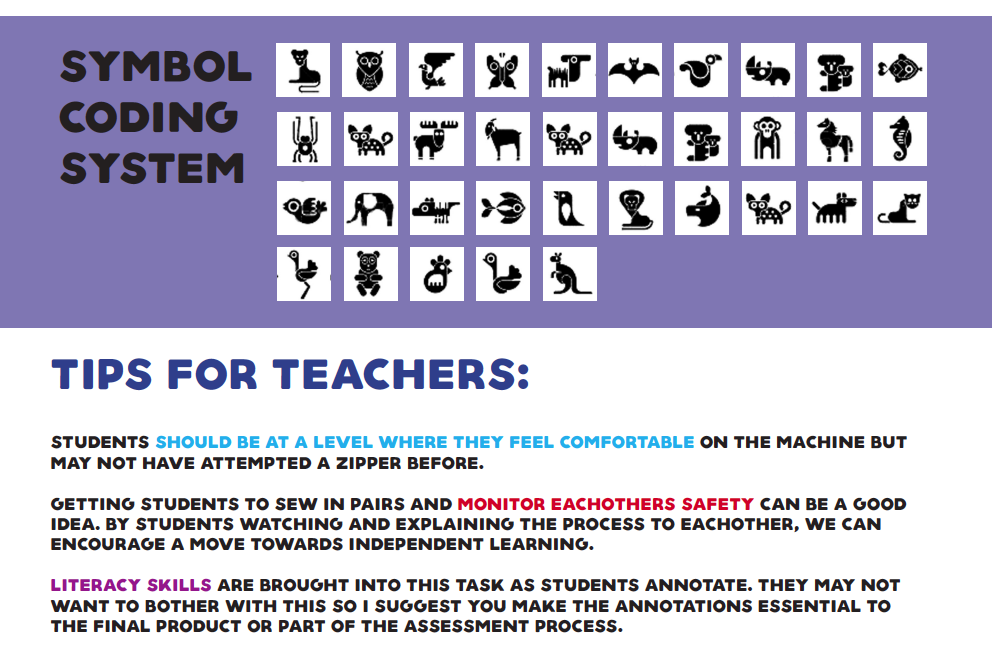
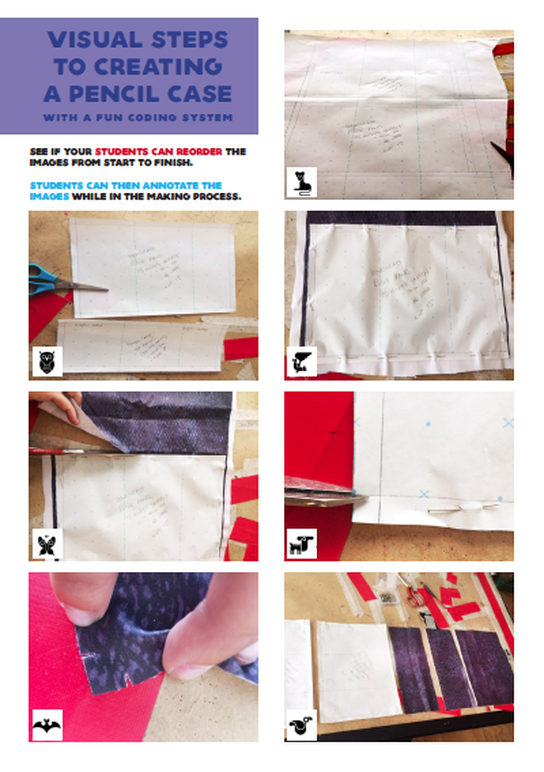
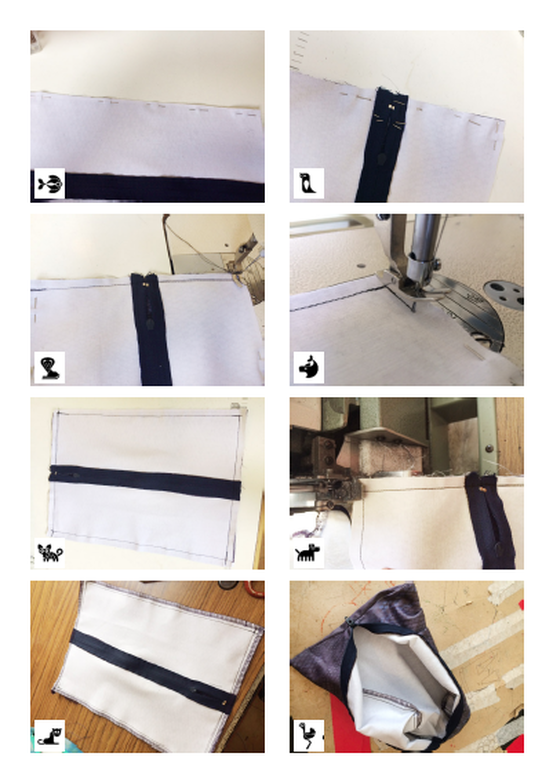
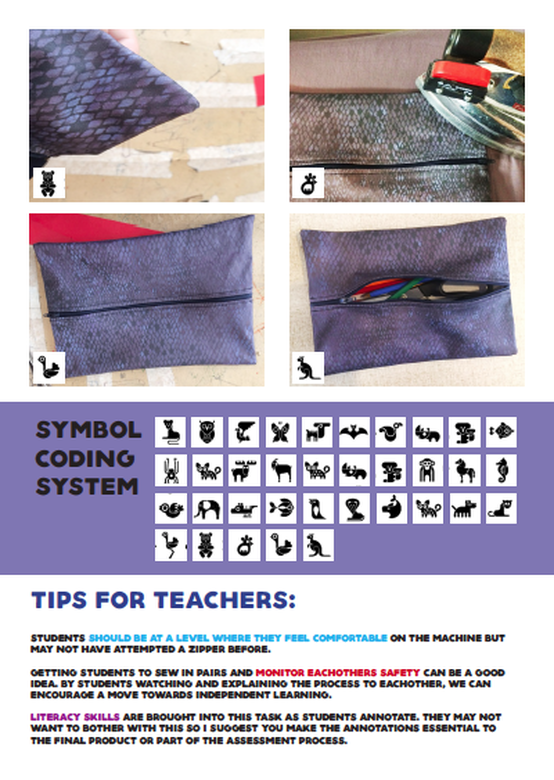
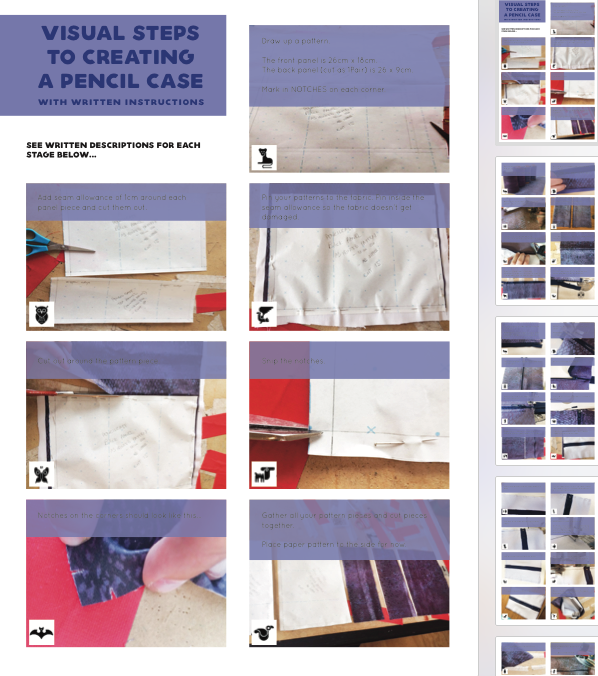
Pencil case process
Equipment needed:
1x A3 printed fabric
Sewing machine
Threads
Overlocker (optional)
See example final result below...
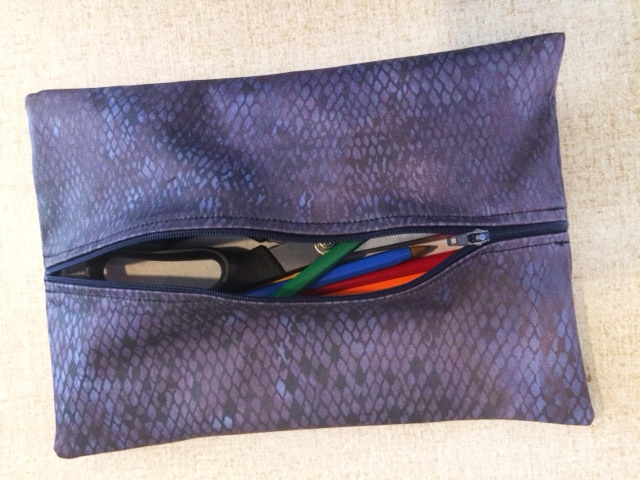
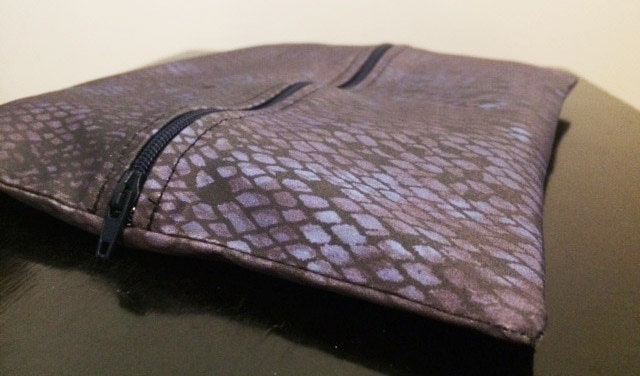
SAMPLE PENCIL CASE
| pencilcase_steps.pdf |
|

|
|
|
PENCIL CASE PROCESS - STEP BY STEP PDF
Download the below file for step by step instructions...
| pencilcase_steps_with_instructions_v2.pdf |
FRUIT MESSAGES

|

|

|

|