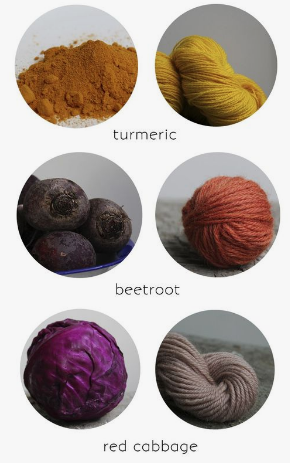
SHIBORI & WOOL
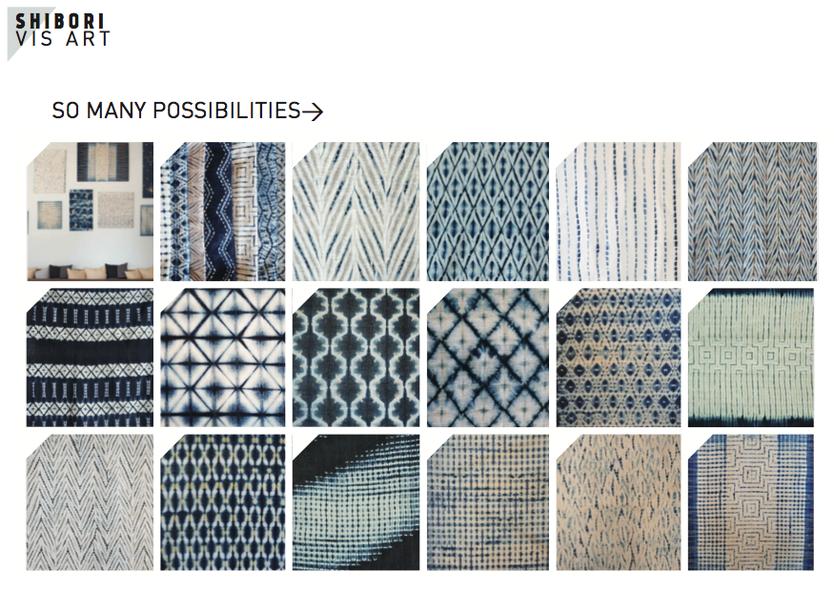
Shibori is a Japanese manual resist dyeing technique, which produces patterns on fabric.
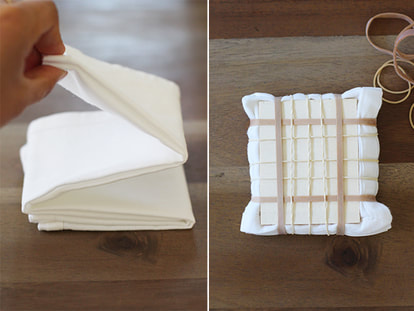
Shibori typically involves folding, twisting or bunching cloth and binding it, then dyeing it.
BASICS:
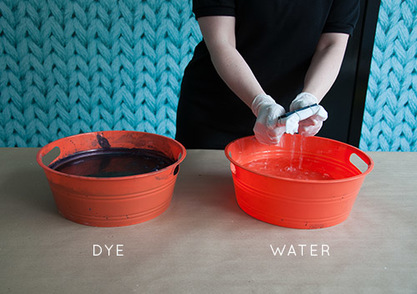
> Prepare dye baths an hour before
> Always dip fabric (undyed) into clean water FIRST
> Soak fabric for 5 mins (when dying)
> More time in dye bath = stronger colour
> After dyeing leave to dry overnight
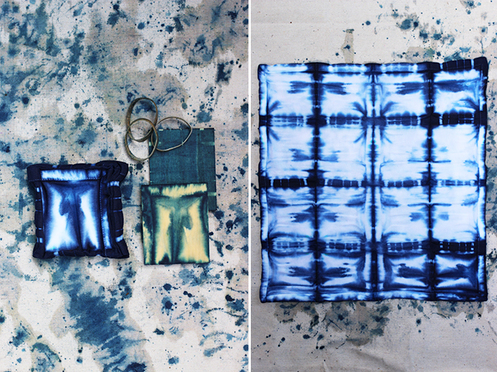
UNVEILING...
> Rinse the fabric in water before snipping away the rubber bands
Shibori typically involves folding, twisting or bunching cloth and binding it, then dyeing it.
BASICS:
> Prepare dye baths an hour before
> Always dip fabric (undyed) into clean water FIRST
> Soak fabric for 5 mins (when dying)
> More time in dye bath = stronger colour
> After dyeing leave to dry overnight
UNVEILING...
> Rinse the fabric in water before snipping away the rubber bands
beauty of shibori – there are no mistakes!
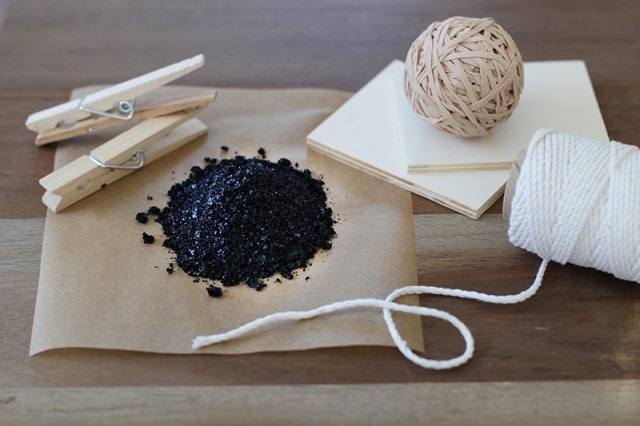
EQUIPMENT
- dye
- water
- tubs
- fabric
- string + elastic bands
- wooden/plastic blocks
- pegs
- rubber gloves
- scissors
- dye
- water
- tubs
- fabric
- string + elastic bands
- wooden/plastic blocks
- pegs
- rubber gloves
- scissors
|
|
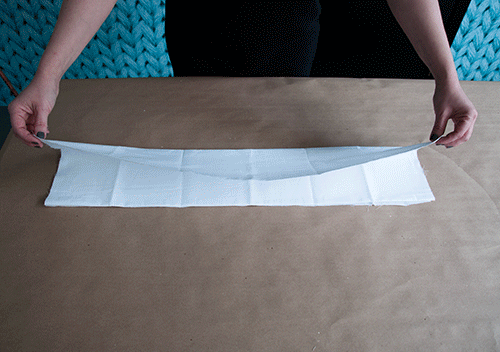
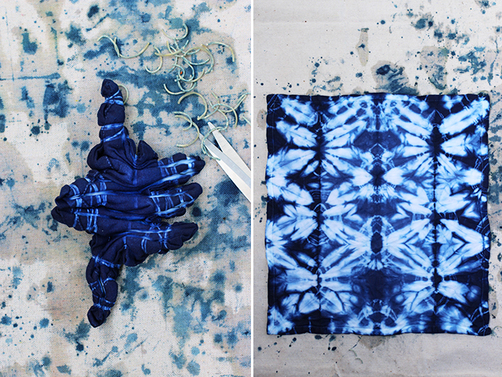
Sample 1: >>> Itajime shibori
Square Accordion Fold - same process for triangle
Square Accordion Fold - same process for triangle
|
|
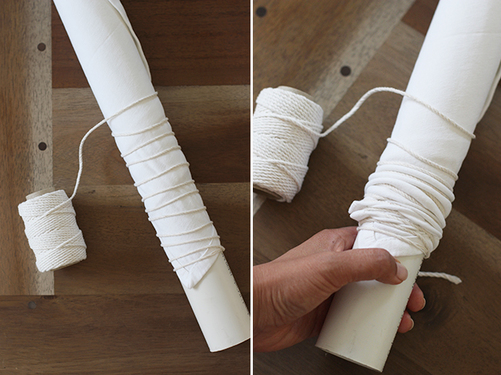
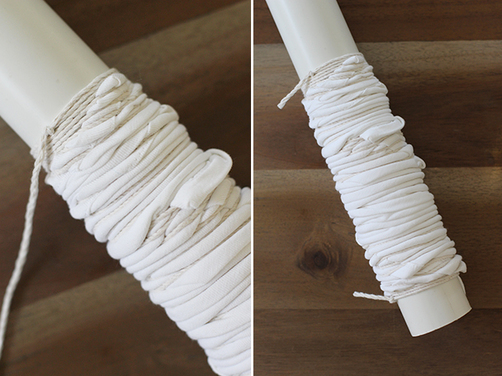
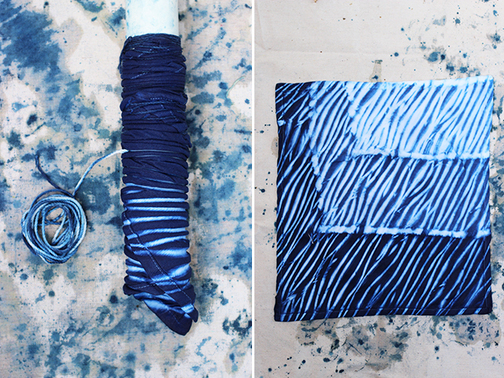
Sample 2: >>>Arashi shibori
Diagnal pole wrap
Diagnal pole wrap
|
|
TIPS:
> fold the fabric onto the pole, use string to keep in place.
> Gently start gathering the fabric to one side
> Work in pairs - one person hold while one winds
> fold the fabric onto the pole, use string to keep in place.
> Gently start gathering the fabric to one side
> Work in pairs - one person hold while one winds
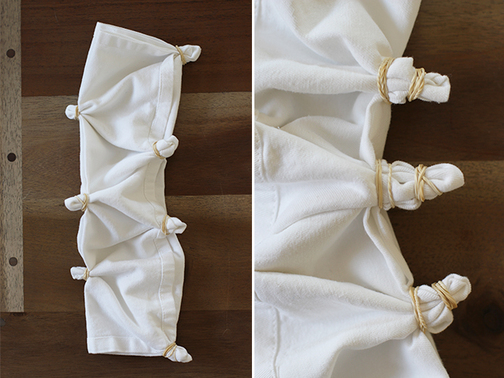
Sample 3: >>>Kumo shibori
Pleated and bound resist technique
Pleated and bound resist technique
|
|
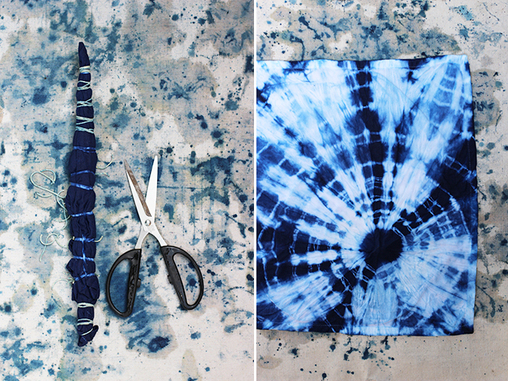
Sample 4: >>> Tie dye
Traditional binding method
Traditional binding method
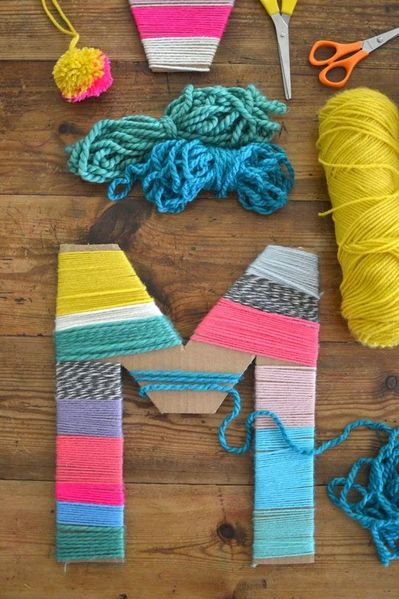
WOOL
WRAPPING
|

|
| gecko_silhouette.pdf |
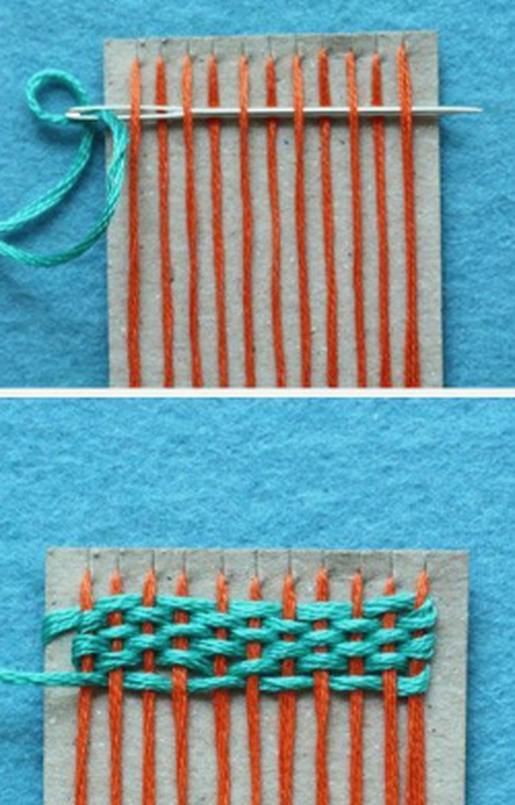
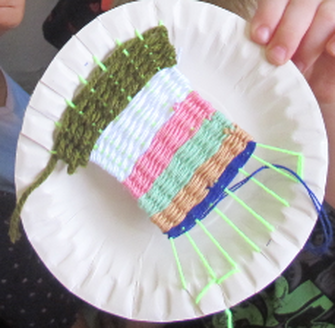
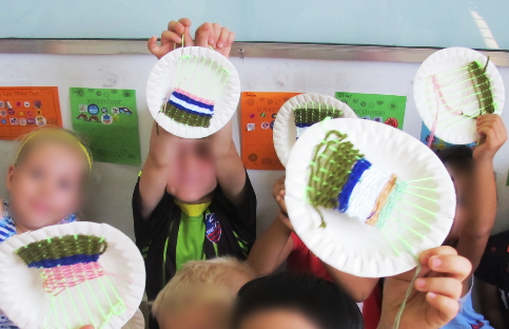
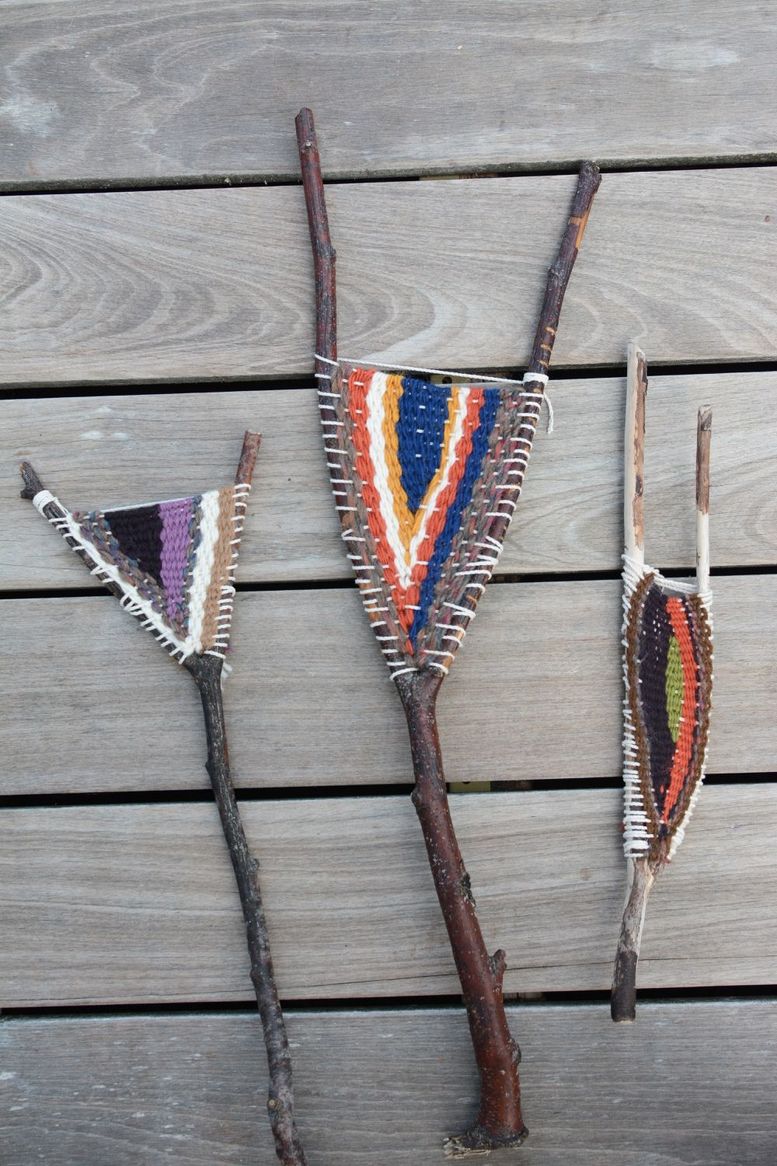
WEAVING
|
|
|
|
BRACELETS
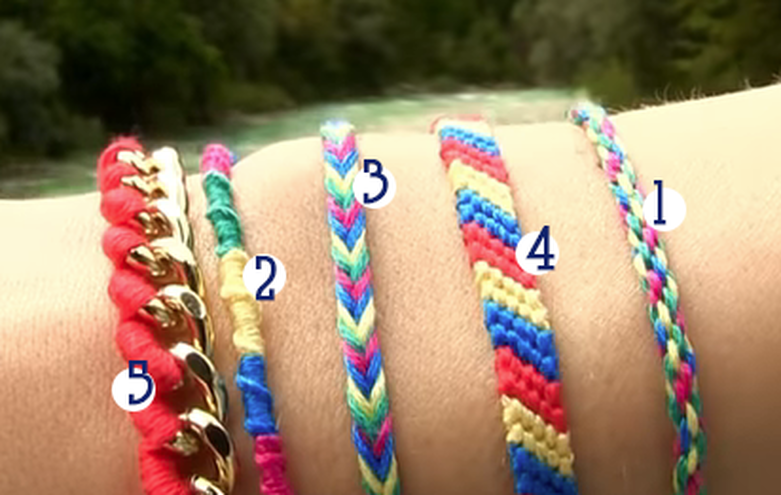
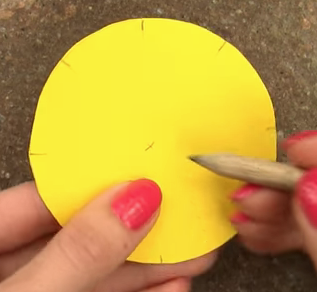
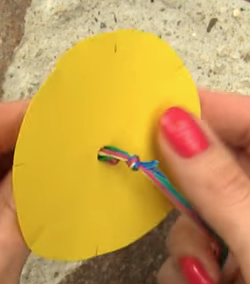
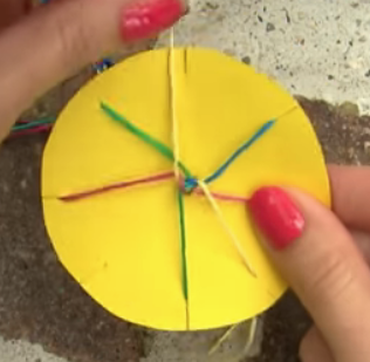
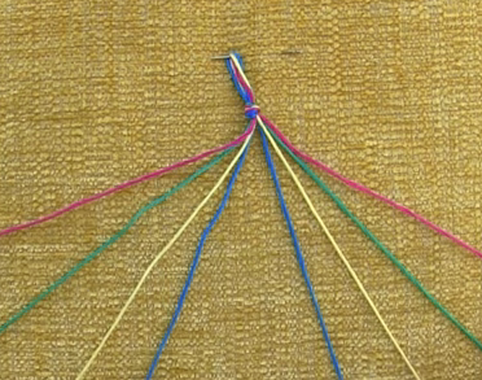
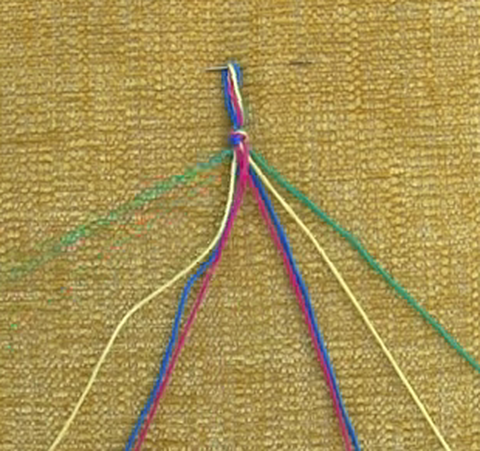
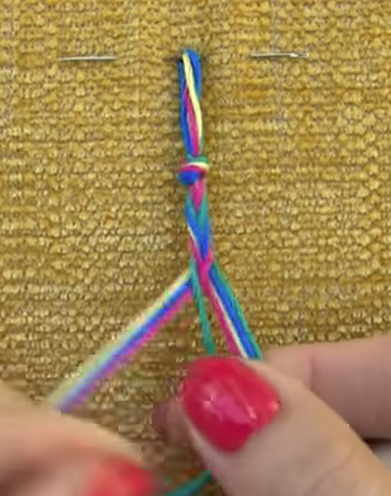
1) ROPE BRACELET
4 yarns pieces 60cm each
circular plate
mark center and place 8 little lines on edges
strings all together, fold in half and knot at end
- remove string 7
put knot through center hole and place strings around edges
EMPTY SPOT - FACES YOU
move third string to the right into the empty spot - then rotate so you face the EMPTY SPOT again
Repeat...
|
|
|
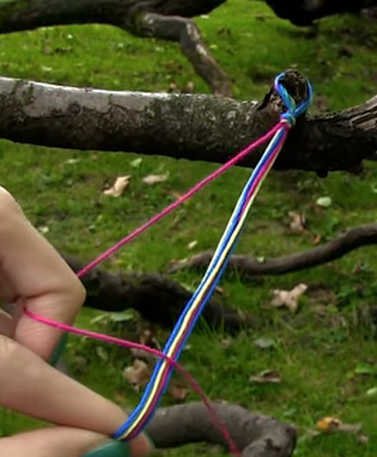
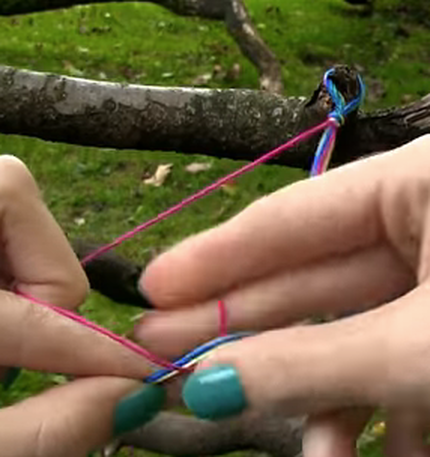
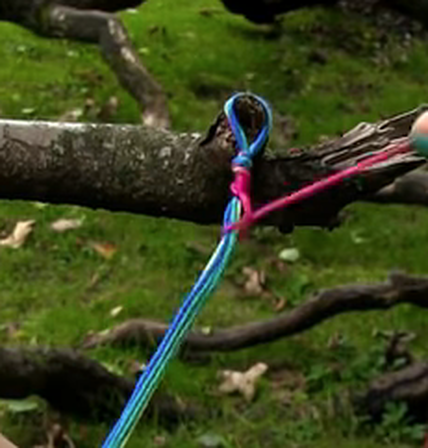
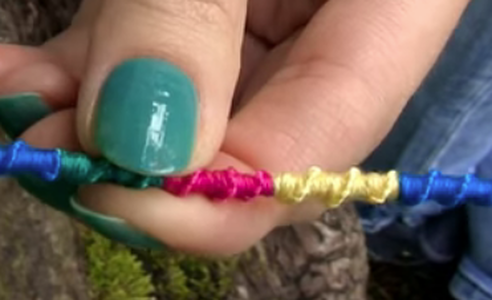
2) SPIRAL BRACELET
4 yarn pieces 120cm each - fold all together in half
knot in middle section (string together)
Attach loop firmly and create a 4 shape
Repeat...and swap threads when you wish!
|
|

|
|
|
|
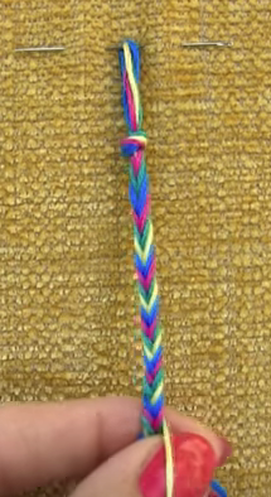
3) FISHTAIL BRACELET
Same starting process as spiral bracelet
4 threads-place together - knot in middle
**Use pillow to place threads in sections and secure loop
Threads into mirror image pattern
Take outside thread and bring into the middle
Repeat...
|
|
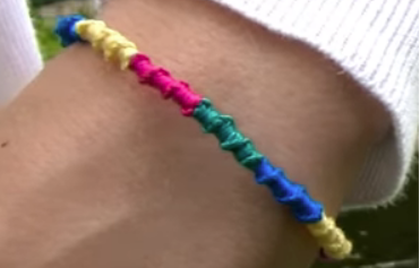
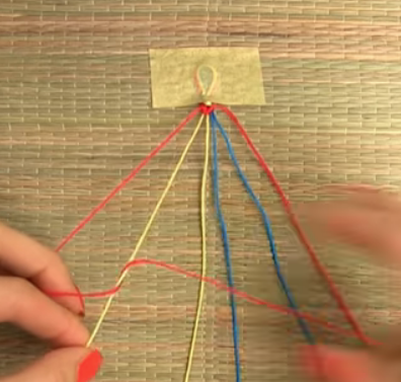
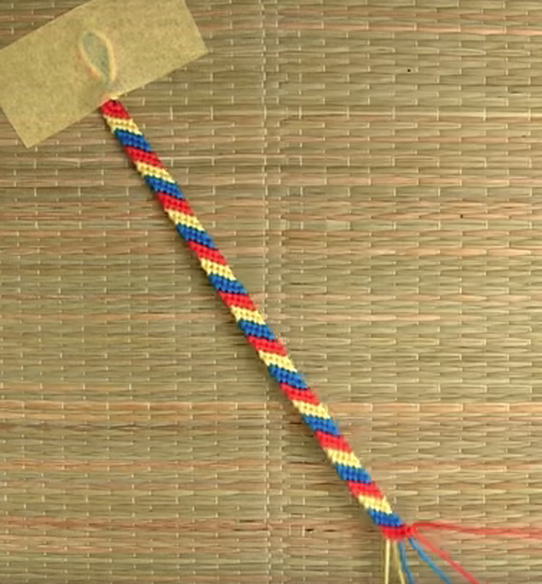
4) STRIPE BRACELET
Cut 200cm of string for each colour (3 colour = total 6)
fold in half and make knot in middle
tape top loop down, spread threads
2 x four shape loops through each colour... repeat with alternative colour
Work from left to right...

|
|
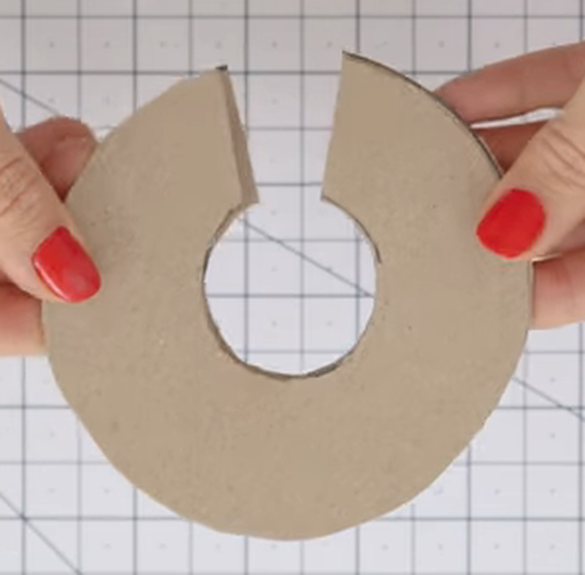
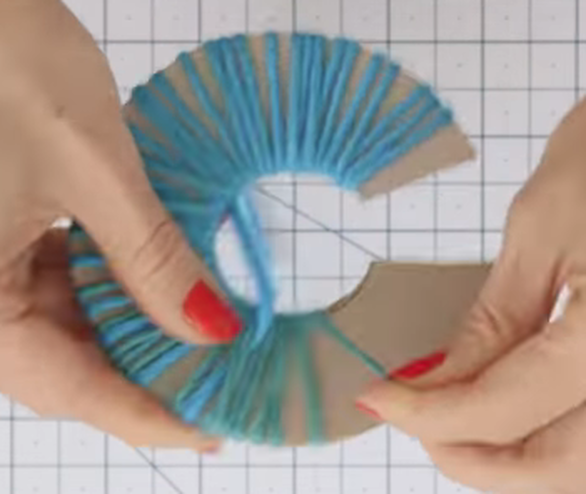
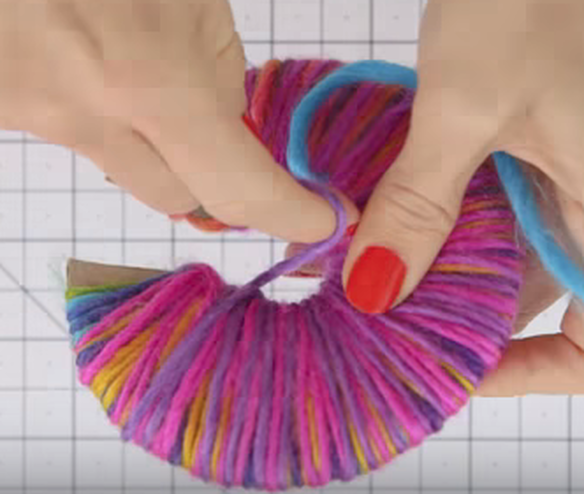
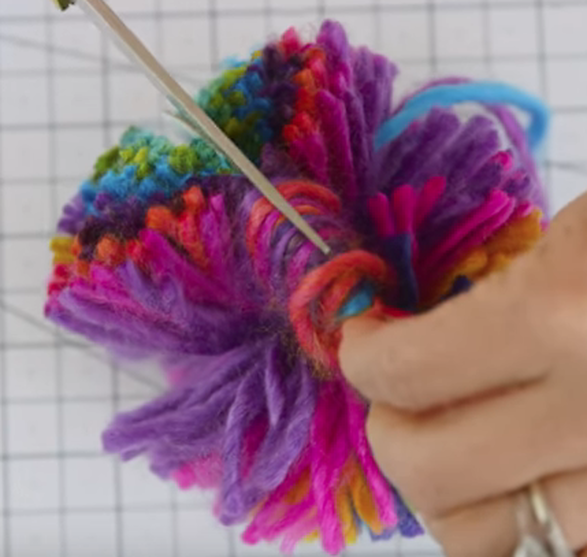
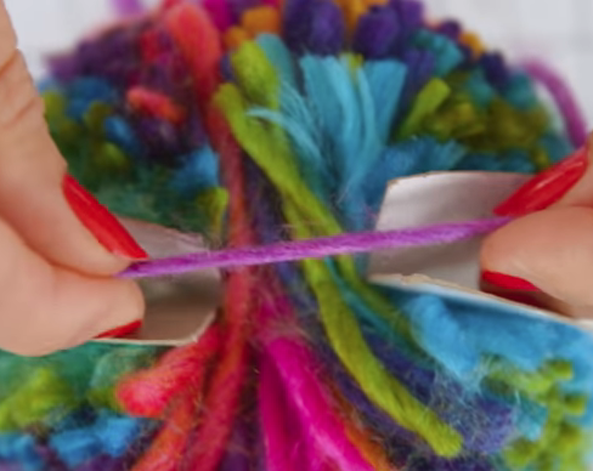
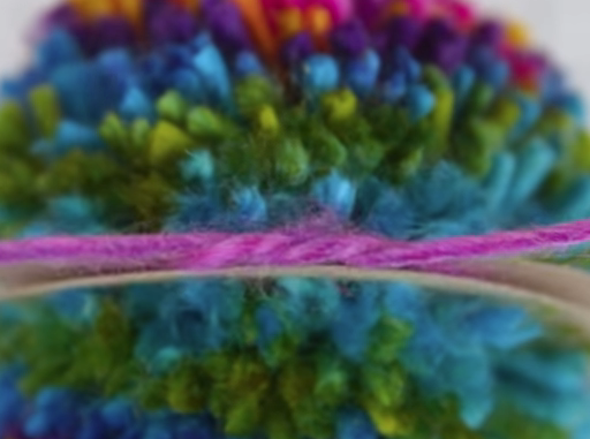
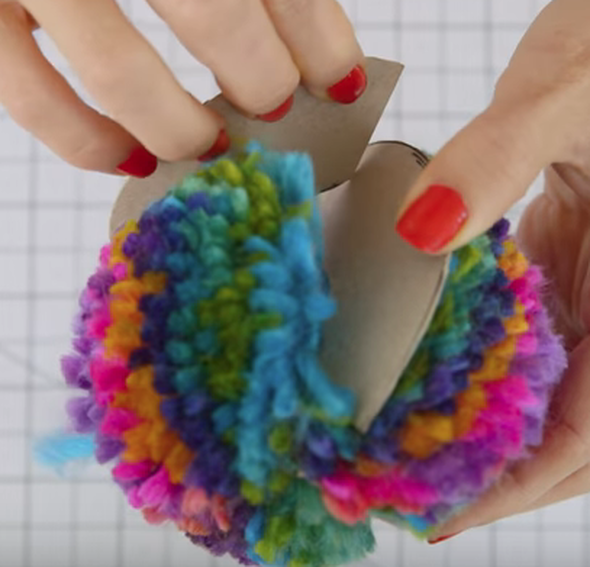
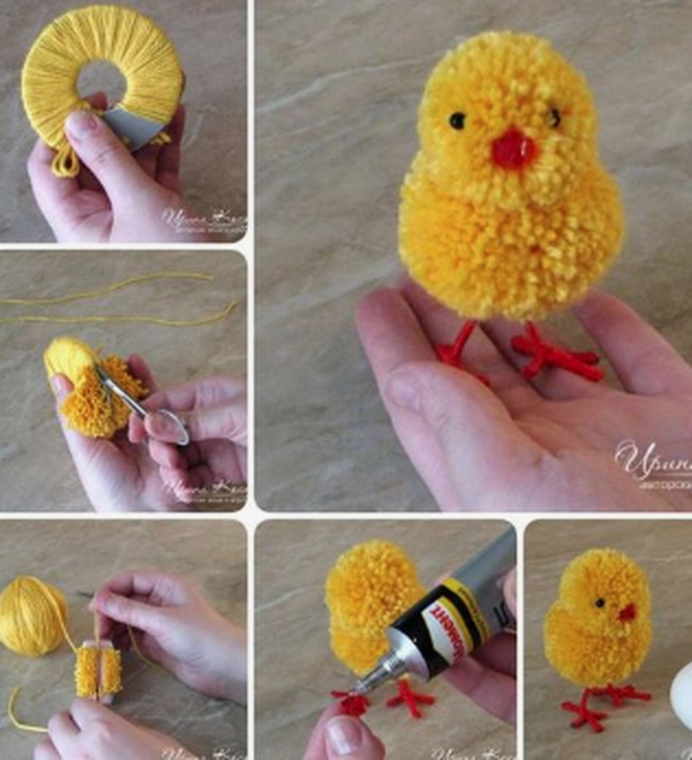
POM POMS
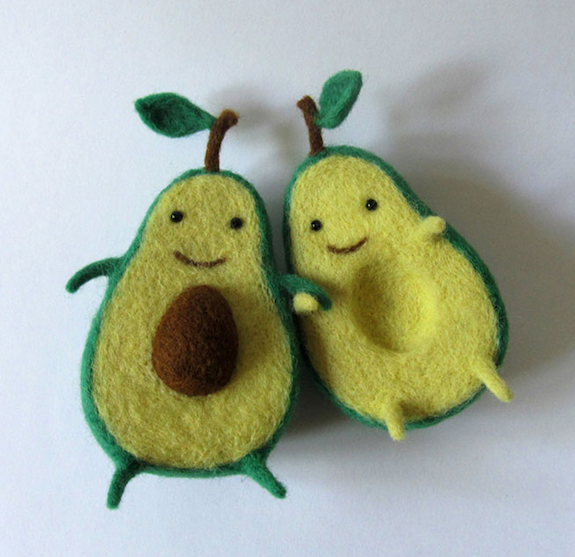
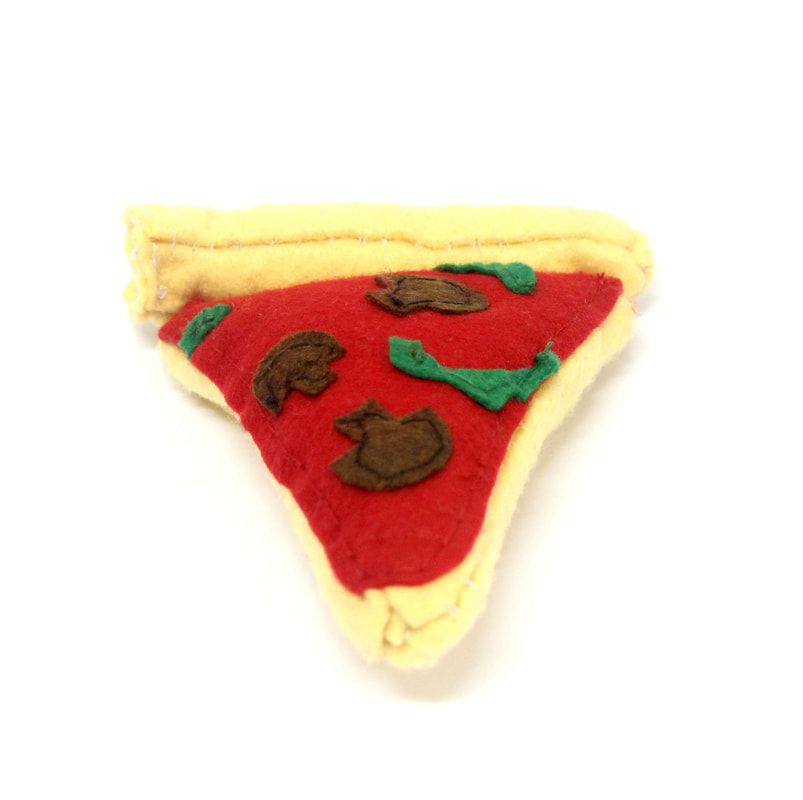
FELT
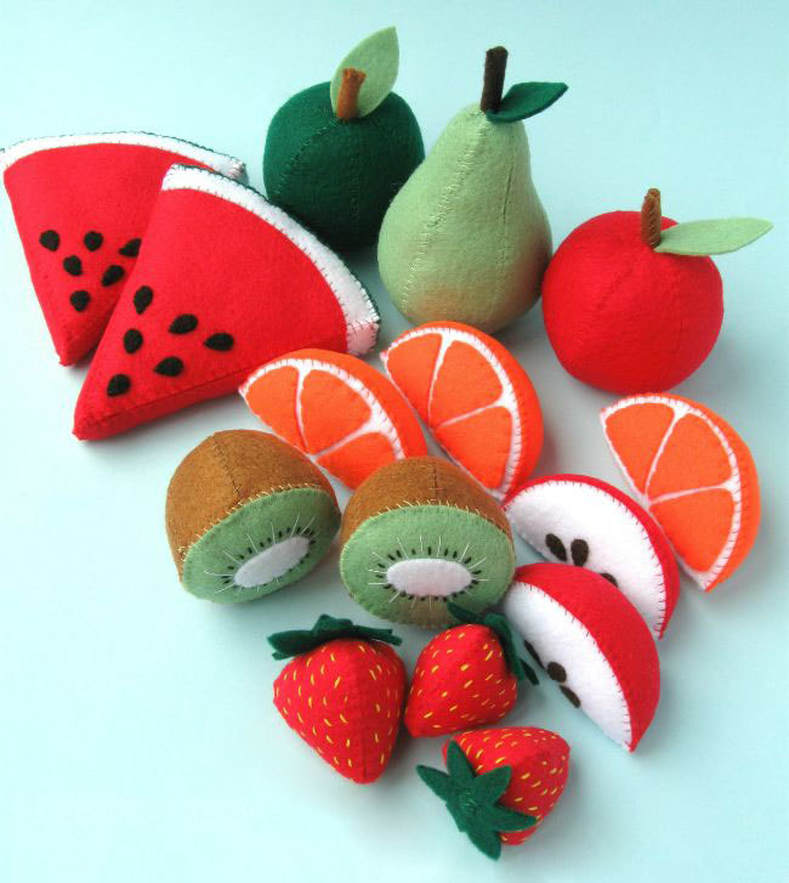
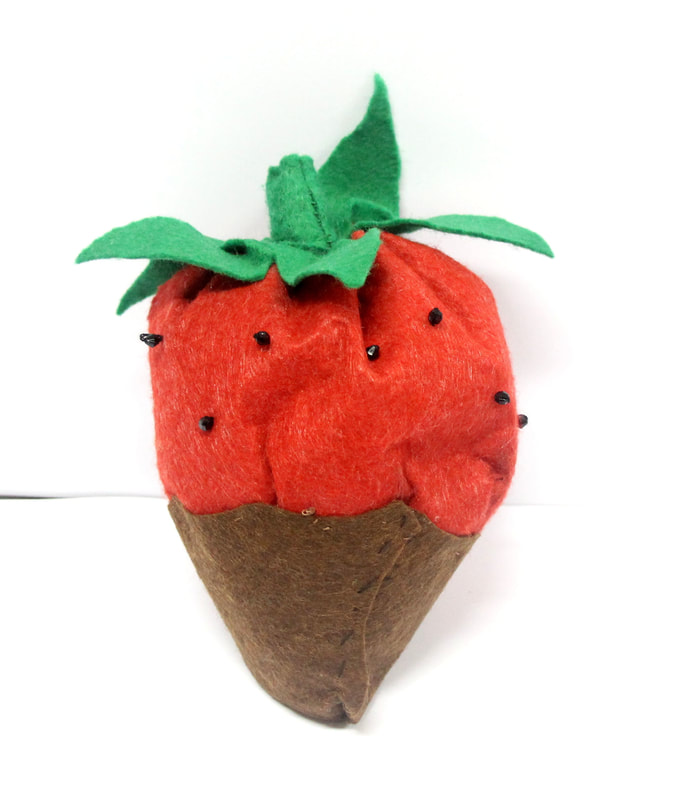
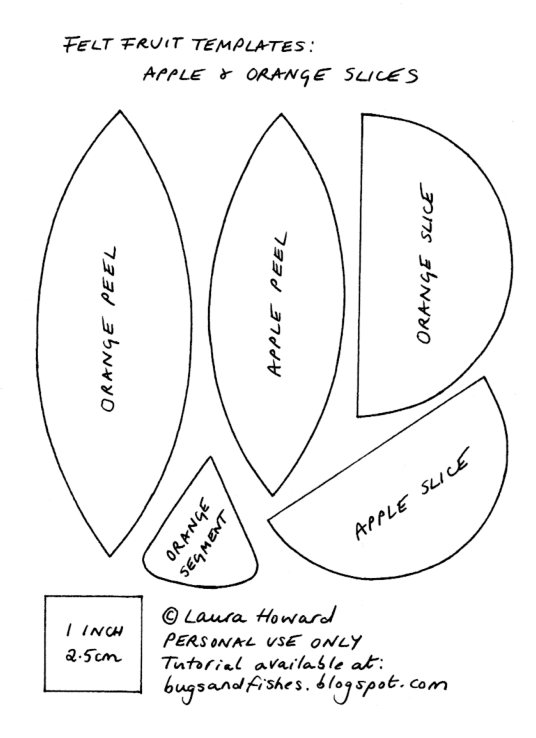
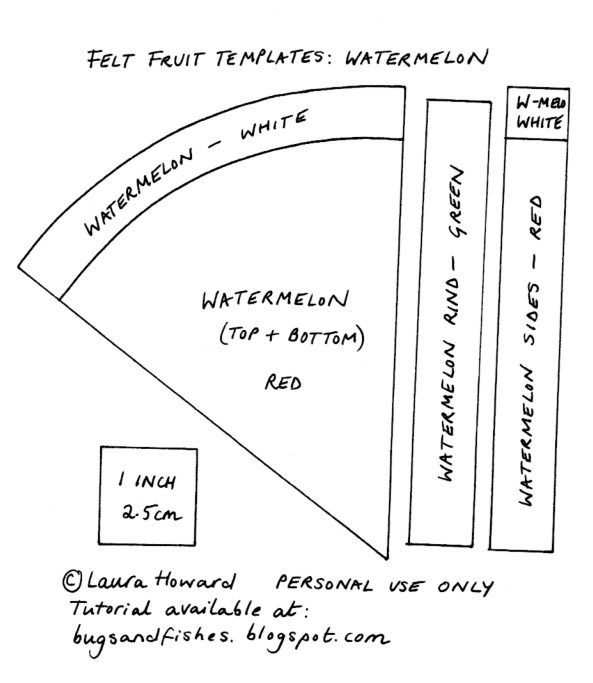
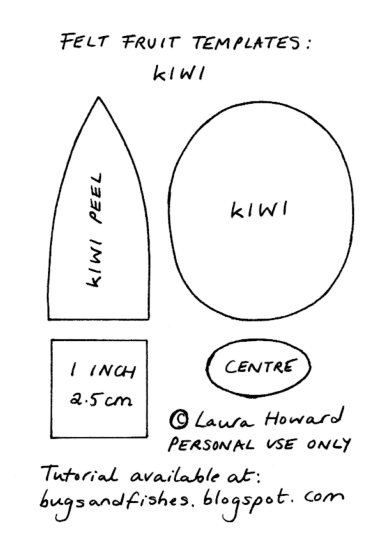
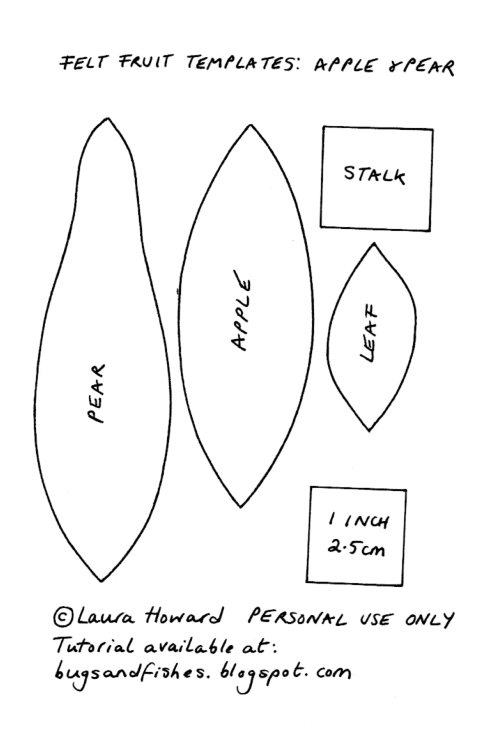
https://bugsandfishes.blogspot.com/search?q=felt+fruit
Equipment list:
The template sheet provided (see the bottom of this post)
Brown, green and white felt
Matching sewing thread
Black embroidery thread
Toy stuffing
Sewing needles and pins
Sewing scissors
The template sheet provided (see the bottom of this post)
Brown, green and white felt
Matching sewing thread
Black embroidery thread
Toy stuffing
Sewing needles and pins
Sewing scissors
|
| ||||
|
| ||||
